
Good Morning Folks :)
I thought I would share a DYI tutorial with you today. When I added my blog page called "Julie's Craft Corner, I had hoped to get at least 2 shared tutorials listed there each week for you to read & enjoy. I guess I am a bit behind on keeping that task accomplished lol. I actually craft in someway at least every other day, in my craft shop on the things that I sell. But I forget at times to takes pictures of those crafts so the post would be more enjoyable. And for me, if I am going to read a tutorial on anything, I like pictures of the project so I can fully understand it & have it to refer back to later.
So, I'm going to try to get more projects posted there more often.
Are you all having a great Spring so far? Have you been outside enjoying the nice breeze, sunshine? Our days here in Tennessee are wishy washy with rain one day and cool enough nights like last night to have to cover my outdoor plants for fear of frost & then tomorrow when it is due to be in the high 80"s. But I am enjoying the days when I can get outside and clean up my patio, porch, etc.
I love for those R&R spots to be cozy and have pretty things enjoyed there for eye appeal as we sit around outside together. I love Wind chimes, always have and I buy them when I go to special places when I see designs that you don't see sold just anywhere. Places like the beach, or tourist attraction sites like the aquarium etc. I will pay both prices of high cost for a pretty wind chime if it is so unique in design or low prices as much as 25 cent in a yard sale if I like it good enough. And most times when the things we buy break or have lost there beauty from the day we =bought them new, we just toss them out. But I don't do that that wind chimes. As they get dull in paint, miss parts, or deteriorate, I craft them back to beauty and most times change them in appearance from the way they were when bought new.
Let me show you what I mean. These are only a few of the wind chimes I have. And some I have only had 2-3 years and some even longer. Wind chimes are usually always exposed to the weathers elements of rain, and suns rays and due to that fact the strings rot, paint dulls, etc. So when you see that your wind chimes have reached that point, you can easily repair them and give them a brand new face lift and avoid throwing them away. These are ones that I worked on the other day while we had a rainy day. So save all your beads, old jewelry pieces, etc and have fun changing them into a new look to still enjoy for a long time.
Here are ones that I have that are missing strings, or the string rotted, dull paint, etc. One is a dragonfly wind chime and then just the old cheap ones of wood I had gotten at the dollar tree that now has dull wood faded. The glass pieces you see on the table is a connected long strand that I got in a yard sale & I will now use each piece on my wind chimes to make them have a new look.
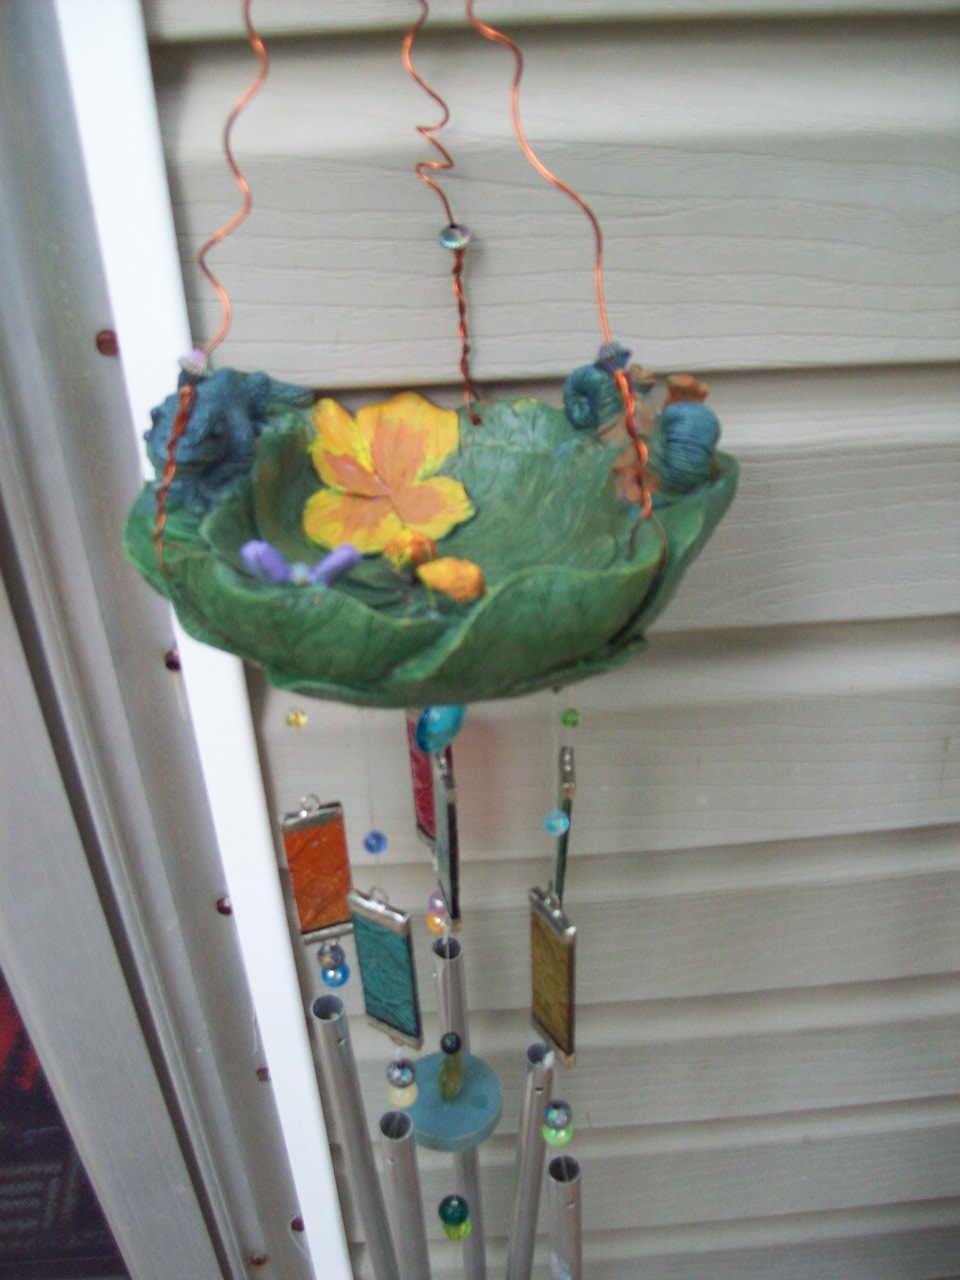
 This wind chime here you see, I have had 12 years now. My daughter got it at the Aquarium I think years ago & when they moved and she no longer wanted it I took it. The top part is a bird feeder or bird water bath to quench there thirst. I use it to hold water so they can get a drink as they land on the edge of it. It was this same color all over but has rust spots from the chain that held it up and the chain is all rusted and breaking.
 Here are some beads I had, and that strand of glass pieces
 If your just re-stringing your chimes then all you need is scissors to cut the fishing line or what ever type string you use to re-do your wind chimes. But I also add copper wire (you can use any kind of wire) to some of my wind chimes top to hang them. If you use clear fishing line then the appear to float in the air. But some look best with wire. The possibilities are endless to revamp them.
So here you see my needle nose pliers, fishing line wire cutters etc. The dragon piece broke off from its wind chime that lets it DONG the pretty sound as it sways in the breeze. But I will use it as a mold cast impression (you will see how as you read on).
 You can just simply re string your chimes or you can add beads to the strings. The original wind chime had beads, but the sun had faded them. So I will replace them with colored ones instead. And you can make the beads appear to float anywhere on each string by sliding the bead on the fishing line after you have ran the string through your chimes hole and then after you have slid the bead on, then take the same string and go back up through the beads bottom hole and you can them move the bead to where you like it on the string.


 And I use the small bottles of paint by +Plaid Enterprises to paint the bird bath you see above. It does not take much paint at all to paint each thing on the birdbath and when it was dry, I sprayed on a clear coat to seal it. The small bottles of paint can be found in the craft section at #Walmart, #Hobby Lobby #Michael's #Ben Franklin Crafts etc. I just bought some today that are 54cent each and are Folk Art brand made by #Plaid and you can even water down the paints as you apply them depending on how light or dark you want you objects painted. I actually watered down each of my colors and they were brushed on in a watercolor thinness, until I got the color I liked best.
Another one after a re-do


 I made my own Donger (that's what I call it lol "the part that hangs at the bottom length & makes the chimes DONG as the wind blows them). Look close at it and you can see the turtle images impressed in the clay. You won't believe what they are made from & how easy it is to make them. *Read on below to find out how*


 Shaped out my own dragonfly & mashed in beads & poked a hole so I can hang it later if I choose to.
 Painted it
 Strung them so they can serve as my Wind chime Dongers
 Then sprayed a clear coat seal on them so the weathers elements don't break them down or chip them off it something hits them etc. Makes the colors of the clay & paints really pop!
 Here's another wooden wind chime I re-did using a paint from plaid in the color terra cotta (I love that color) and I used turquoise glass beads on the top part and took copper wire to make my S shaped closed hooks to hold the strings on that ran through the wooden chimes. Look close at my DONGER in the center..It's a big round terra cotta dry clay shaped ball that I ran a hole through to use & I painted it a mustard yellow color then clear coat sealed the whole piece. This ones my favorite! (Added New Update Note) About the dry clay's ability to with stand wet weather conditions. And I found out that it can not be in the rain or constant moisture places, because the dragon fly marker I made on the stick that you see below, began to get cracks and fall apart after I stuck it into an outdoor flower pot with my plants. I thought if I put a clear coat spray on it that it would withstand water conditions that feel upon it but it did not. So keep that in mind. Thus the name "Air Dry Clay" speaks for it's self. I still think if I would have put like 6 coats of clear seal or maybe thick liquid poly seal on it, that it would preserve it. But I guess that would be another test I would have to try. But I will still make all those fun items and enjoy them in the same way, but just inside my house or patio covered area where constant water or moisture can get to them. I love the Crayola air dry clay! A lot of people just think of crayons or markers for kids to use when they hear the word Crayola. But they make lots of unique items that can be used in permanent art projects. Like there fabric crayons. Which I will post this week in another tutorial so you can see what I mean. I also am adding some new windchime photos below~since I last posted this #DIY tutorial for you to enjoy.


And trust me, you do not have to be a painter or great artist to re-do your old wind chimes.
All you need is some fishing line, beads from old jewelry etc if you want to dress them up.
you can use spray paint to give them new makeovers but I paint ALOT in my craft shop so I keep these tiny bottles on hand to use for all my paint projects. Prices vary for store to store but they usually run from 54 cent per 2 ounce bottle up to $1.99 I always try to get the lowest priced ones.
And just get you a craft liner brush for $1+ o you can even paint these small objects with a foam craft brush, old makeup brushes or even Q-tips. And I just save old lids to yogurt cups etc, barely pour out the size of a dime's worth of paint & water it down most times, then paint. Those little bottles really go along way for you to last. You can buy them at most all stores that have a craft section or online at Plaid http://www.plaidonline.com/folkart-acrylic-colors-2-oz/38/product.htm


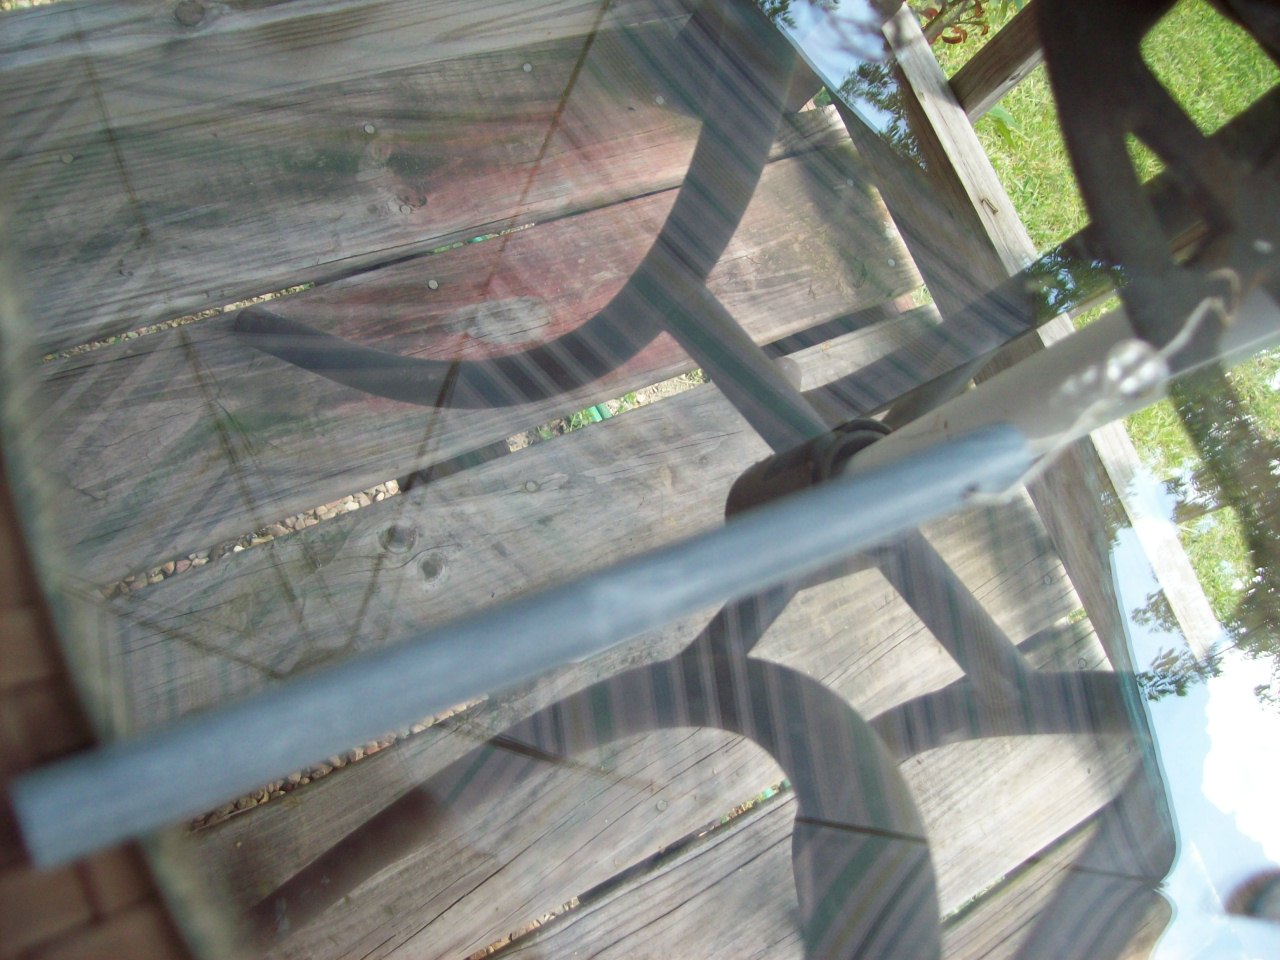
 The other wind chime you see in the picture, is one that I bought from a elderly near by neighbor that I really don't know very well but he made windchimes from old parts of anything that he had & sold them in his yard sales. It was just old parts made used pipes, clear pvc Plexi glass as the top plate to hold the chains, and I think a metal gear wheel as the donger. He didn't have anything beyond the donger part that made it spin. It did dong as the wind blew it but I spray painted it all red then I added a big wooden shaped teardrop that I drilled a hole in and attached it to the bottom side of the donger part that he had put on. Now as the wind blows it will hit the pipes a bit harder to chime in sound and it spins around to show the scenery that I put on it. I will share that painting tip with you lastly here today and then let you move on to some other great blogs to enjoy :)
Well, first I will say that the Lord has blessed me with being about to paint just about anything I can think of by painting freehand and from what my minds eye sees. And yes, I love it and can do so for hours and feel like I have only been at it for minutes. But it is very time consuming. So at times of tiny projects like this one, I take all the easy short cuts that I can to get done sooner yet still enjoy the look I am shooting for. So today I will give you some of those short cut paint design ideas so you can do the same idea onto things that you may want a painted scene onto.
So here below are those steps to create a sunset and a black silhouette painted scene. And you can use spray paints if u have those (which are faster to dry) or craft paints like I do because I have more colors in those. Or the combo of both which I did here today.
First I took my plain wood and brushed it with the color Terra cotta in my craft paints, let it dry for about 20 minutes. Then to get your sky, sun rising or setting, the ground plains, you can cut out a half circle from paper and then a wavy piece of paper and brush on those colors or spray them on in layers

then a brushed on a light spot of white paint for my sky

then added in some blue color. I was sloppy too so u don't have to be neat with the lines of texture of the paint going on. If the paint is thick or deep it just adds dimension and makes it look 3d which is pretty too.


more colors added with my wavy paper piece which you just brush across at the wavy part as you move down the wood and let each one dry for about 10 minutes just so your paper does not wipe off the previous color

next I needed a circle for my setting sun so I hand mashed my paper onto a cardboard tube that had my brushes stored in it


then I cut that shape out

cut the inner circle out for my sun and repeat the same steps above in yellow


now you let that dry 10 minutes then add a purple line thru your sun at the mid bottom part
by using your wavy paper

now take your paper away and just drag your brush on out across the wood horizontally and blend any colors there together, this makes your ground colors

I don't have to be perfect here at this point because I am going to add on a black horse running as my silhouette image. I printed the size I needed and cut out and placed it on where I thought it looked best below my far away sunset. (BTW you can find any image for the web to cut out and use as your stencil design, this one was from my art program so I used it. Feel free to copy & paste that image you see and just cut it out to use)


Here is when I used my black spray paint in a can found at walmart in the hardware isle cheapest can for 99cent
 then I wanted to add some cactus around my running horse which I did with green paint and a liner brush but you could even use q-tips as your brush. And they are simple to draw, they look like a stick person with no head just arms lol then a put tiny White marks about them as there needles and then put on a thin color of the Terra cotta below the horse as the red clay dirt.
 I just painted on the words wild wild west on the other side
 I think they look pretty on the brown metal Shepard's hook that I have beside our grill.
Wish now I had done a dessert scenery on my grill cover instead of retro food a few years ago. LOL
Because my patio area is getting a redo as I have time. I want to finish the western scenery on the bottom wall that I started this past fall. Which I will share with you as I do finish it. :)

I thought I would share a DYI tutorial with you today. When I added my blog page called "Julie's Craft Corner, I had hoped to get at least 2 shared tutorials listed there each week for you to read & enjoy. I guess I am a bit behind on keeping that task accomplished lol. I actually craft in someway at least every other day, in my craft shop on the things that I sell. But I forget at times to takes pictures of those crafts so the post would be more enjoyable. And for me, if I am going to read a tutorial on anything, I like pictures of the project so I can fully understand it & have it to refer back to later.
So, I'm going to try to get more projects posted there more often.
Are you all having a great Spring so far? Have you been outside enjoying the nice breeze, sunshine? Our days here in Tennessee are wishy washy with rain one day and cool enough nights like last night to have to cover my outdoor plants for fear of frost & then tomorrow when it is due to be in the high 80"s. But I am enjoying the days when I can get outside and clean up my patio, porch, etc.
I love for those R&R spots to be cozy and have pretty things enjoyed there for eye appeal as we sit around outside together. I love Wind chimes, always have and I buy them when I go to special places when I see designs that you don't see sold just anywhere. Places like the beach, or tourist attraction sites like the aquarium etc. I will pay both prices of high cost for a pretty wind chime if it is so unique in design or low prices as much as 25 cent in a yard sale if I like it good enough. And most times when the things we buy break or have lost there beauty from the day we =bought them new, we just toss them out. But I don't do that that wind chimes. As they get dull in paint, miss parts, or deteriorate, I craft them back to beauty and most times change them in appearance from the way they were when bought new.
Let me show you what I mean. These are only a few of the wind chimes I have. And some I have only had 2-3 years and some even longer. Wind chimes are usually always exposed to the weathers elements of rain, and suns rays and due to that fact the strings rot, paint dulls, etc. So when you see that your wind chimes have reached that point, you can easily repair them and give them a brand new face lift and avoid throwing them away. These are ones that I worked on the other day while we had a rainy day. So save all your beads, old jewelry pieces, etc and have fun changing them into a new look to still enjoy for a long time.
Here are ones that I have that are missing strings, or the string rotted, dull paint, etc. One is a dragonfly wind chime and then just the old cheap ones of wood I had gotten at the dollar tree that now has dull wood faded. The glass pieces you see on the table is a connected long strand that I got in a yard sale & I will now use each piece on my wind chimes to make them have a new look.


So here you see my needle nose pliers, fishing line wire cutters etc. The dragon piece broke off from its wind chime that lets it DONG the pretty sound as it sways in the breeze. But I will use it as a mold cast impression (you will see how as you read on).


At this point you can stop adding beads, or add more on top of that one or do the other beads the same way and float them apart from each other. Be sure to give yourself plenty of string so you have the extra length to do this with the beads.
After I added new fishing line to the chimes, extra beads, copper wire as my hanging source instead of chains it came with that had rusted and painted the individual objects on the bird bath part , this is what it looks like now. Oh, and I sprayed it with a clear coat so it will last longer in the elements & the clear coat makes the colors pop!


Another one after a re-do

Here were old wooden ones that needed new strings, and the natural wood color had faded


NOTE* It helps to take pictures before you undo your old rotten string so you can refer back to see how you need to run the new string.
Here they are all taken off and red to paint, let dry, then restring, bead, etc.
When I bought these in the Dollar Tree they were a pretty stained wood color.Now they look terrible. So I gave them a new face lift (see on below)

After being re-strung & painted purple (I can free hand paint just about anything, but I took the lazy road and used metallic stickers of butterflies to add to the wood & then sprayed the complete wind chimes with a clear coat spray to seal them.The stickers can be found also in the craft section at Walmart ( where the scrap booking things are) they had a whole sheet of butterflies for $1

Here's another wooden one I did in a green color with a Sea Turtle theme


I made ALL these different shapes to use as my wind chimes Dongers & as plant markers
By using the genius product that #Crayola sells called
Air Dry
Clay
It looks like this when you buy it and comes in a few different colors.
I bought a tub of White and a tub of Terra cotta
This stuff is amazing. It drys as hard as a ROCK with no need for baking to cure it.
Me & my grandson played around with tiny pieces before I decided what to make with it because I didn't want to waist it. So we just made shapes, I ran a wooden skewer through it to made clear holes through it to dry to see if it cured hard enough so that I could run my string or fishing line through it later. I took objects like charms and mashed them into the clay to create an impression of the object to see what it revealed. And when the clay dried then I knew I was going to love what all I could use it for. My mind was just a reeling at the ideas ahead.
These are the things we played with at first to see how it did. My grandson made a head of Jack Skeleton, I made some tubes, and shapes with holes poked through to use as my Donger for my wind chimes, I mashed down beads inside a shape to see if it would take hold & stay after they dried.

Here I painted the impression of the turtles that I had mashed in with my charms, And I had a dragon fly charm that I also mashed in a square one that shaped and I ran a wooden stick through it just let it dry with it inside it so I can use it as a plant marker as something pretty to dress up my plants in my pots. After the impression dried on the clay, I then painted it with my paints watered down as mentioned about & I added beads etc to make it look like a dragon fly .
The Terra cotta colored clay is really dark when it's wet, when dry it looks like a lighter color as here in the picture. Later on down in my photos you will see where I clear coat sprayed it and gave it a luster sheen & looks like the dark color when it's wet. I like both color choices. I thought since my pieces will be exposed to rain etc that I should clear coat them. I guess we will see how they do. I know they dry like concrete so I think they will stay that way.


And trust me, you do not have to be a painter or great artist to re-do your old wind chimes.
All you need is some fishing line, beads from old jewelry etc if you want to dress them up.
you can use spray paint to give them new makeovers but I paint ALOT in my craft shop so I keep these tiny bottles on hand to use for all my paint projects. Prices vary for store to store but they usually run from 54 cent per 2 ounce bottle up to $1.99 I always try to get the lowest priced ones.
And just get you a craft liner brush for $1+ o you can even paint these small objects with a foam craft brush, old makeup brushes or even Q-tips. And I just save old lids to yogurt cups etc, barely pour out the size of a dime's worth of paint & water it down most times, then paint. Those little bottles really go along way for you to last. You can buy them at most all stores that have a craft section or online at Plaid http://www.plaidonline.com/folkart-acrylic-colors-2-oz/38/product.htm
I bought the Crayola Air Dry Clay at Michael's but it's probably sold at Walmart etc.
I adore that product. The tub states ages 6+ and I could make things from it daily and never tire lol.
I think next that I will make me some potted plant huggers. You know what those are don't you?
They are really just for looks to add eye candy to your potted plants. I think I will try to make some ladybugs, maybe inch worms, butterflies landing on the pots side. When you make them you just choose how you will structure there feet etc. If you want them to HUG your pot's edge you just bend the foot or hands over a bit so after they dry, you can hang them onto the pots edge rim.
I'm no sculptress, but I could take another tiny kids toy and try to mold and mock the shape so it's the same tiny size, then after it dries, paint t if I choose too.
I think little turtles would be cute made with there feet holding on to the pots edge.
I you have any ideas for ones to make, leave me a comment below so I can have more choices to make.
I hope you enjoyed my Wind Chimes & how easy it is to give your old ones a face lift & new life.
When I tire of the ones I just re-done, I know I could sell them in a yard sale etc.
I have a huge one that hubby got me long ago that has tear drops made as the chimes from brass & clear prisms that I am re-doing so when I get it done I will share it with you too.
So until then, think twice before you toss out your wind chimes that have seen better days. Instead go raid your hubby's tackle box looking for a few simple items of fishing line, wire, pliers, some paints of some sort & make them over again to enjoy :)
Here are the ones I have made or re-vamped since I first posted this #DIY tutorial
This one I bought last year +Dollar General Store for $8 (regular price wow) and it is a glass plate type wind chime that was painted with an etched in paint design. The tiny plastic butterflies with just clear and over time got dull with a yellowish tint, so I used my paints from plaid to brush on then clear coat them. If you have not been into a #Dollar General store lately the you need to head there for there summer decorations. We have about 5 location stores here in our town and each one has an isle of nothing but summer items to use and enjoy. Like wind chimes (I mean nice unique #wind #chimes too for $5 & $8 only! And metal decorations that you can use in so so many ways!

Like this Huge Metal butterfly here that I bought just 2 days ago for $3.50!!
Then I came home & added the fishing line & tear drop prisms to it to make it into a "what I call a twirling sun catcher".
You can easily, easily add chimes or anything like this to a metal structure like this because of the holes that it has on the piece.
I am always looking out for items like this to use in different ways.
I knew when I see the holes in it's wings that I could make it into something else.
Though it came with the chain for hanging, so you could use it on your mailbox, a Shepard's hook, or just stick the metal ends into a big flower planter. Or maybe from a wooden stick amongst all your pretty flowers outside in your flower or veggie garden.

this turned out so pretty. It only took me 10 minutes to add the fishing line & prisms to it. And when it turns in the sun the light beams thru the prisms and is so peaceful looking.
Just the butterfly alone is so pretty. Wouldn't that look beautiful onto a big wreath for your homes door or a grave site as decoration?
I think I will hit the other locations & see if they have other colors of them. The store I went to only had the one left.
Ok last but not least, I made 2 more wind chimes to share with you today, then I'm sure your tired of reading by now lol.
This one I call my bucket wind chime. I got this idea a few years back when I did my huge bucket wind chime (which can be seen on my Julie's Craft Corner page).
You can easily take any type bucket and make it into a wind chime by using the bucket upside down or right side up (like this one is). I like right side up because I plan on putting dirt into it and letting some type plant grow and flow over it.
You simply pick your bucket choice, drill or hammer holes on the top side in 2 or 3 places to run your wire through to hang it. This one had handles so I just used them as my holding force to add my wire too. And even though I forgot to take pictures of the bottom side, you simply also poke u some holes there for your chimes to be strung through and hang. To do that you run your fishing line or string up thru the holes and use anything that will run thru that same fishing line or wire and loop off through to keep them from slipping out. I used old nuts from bolts, or I have used nails with the string tied around it horizontally so they don't come through the holes or you can use old buttons that have eyes in them etc. Then you just let them dang from underneath. I used a tiny clay pot in the center to dangle down that has the holes already in them for my donger to create the chiming sound as it sways and hits the metal pipes. You can use old silverware as your chimes, pipes like you use for plumbing, pvc pipe cut off, etc etc. Anything that can be drilled a hole through to add string to and dangle can be used as your chimes.
This bucket was just plain silver so I spray painted it brown, then used my craft paints to brush on the colors I liked onto the already raised embossed designed flowers that were on it. Then I clear coat sprayed it to make it last long in the sun. I clear coat almost everything! :)
You can find clear coat spray paints in any hardware isle that range in price from 99cent to $5 and it last a long time because you only use it as a sealer after you have completed your projects.

Well, first I will say that the Lord has blessed me with being about to paint just about anything I can think of by painting freehand and from what my minds eye sees. And yes, I love it and can do so for hours and feel like I have only been at it for minutes. But it is very time consuming. So at times of tiny projects like this one, I take all the easy short cuts that I can to get done sooner yet still enjoy the look I am shooting for. So today I will give you some of those short cut paint design ideas so you can do the same idea onto things that you may want a painted scene onto.
So here below are those steps to create a sunset and a black silhouette painted scene. And you can use spray paints if u have those (which are faster to dry) or craft paints like I do because I have more colors in those. Or the combo of both which I did here today.
First I took my plain wood and brushed it with the color Terra cotta in my craft paints, let it dry for about 20 minutes. Then to get your sky, sun rising or setting, the ground plains, you can cut out a half circle from paper and then a wavy piece of paper and brush on those colors or spray them on in layers

then a brushed on a light spot of white paint for my sky

then added in some blue color. I was sloppy too so u don't have to be neat with the lines of texture of the paint going on. If the paint is thick or deep it just adds dimension and makes it look 3d which is pretty too.


more colors added with my wavy paper piece which you just brush across at the wavy part as you move down the wood and let each one dry for about 10 minutes just so your paper does not wipe off the previous color

next I needed a circle for my setting sun so I hand mashed my paper onto a cardboard tube that had my brushes stored in it
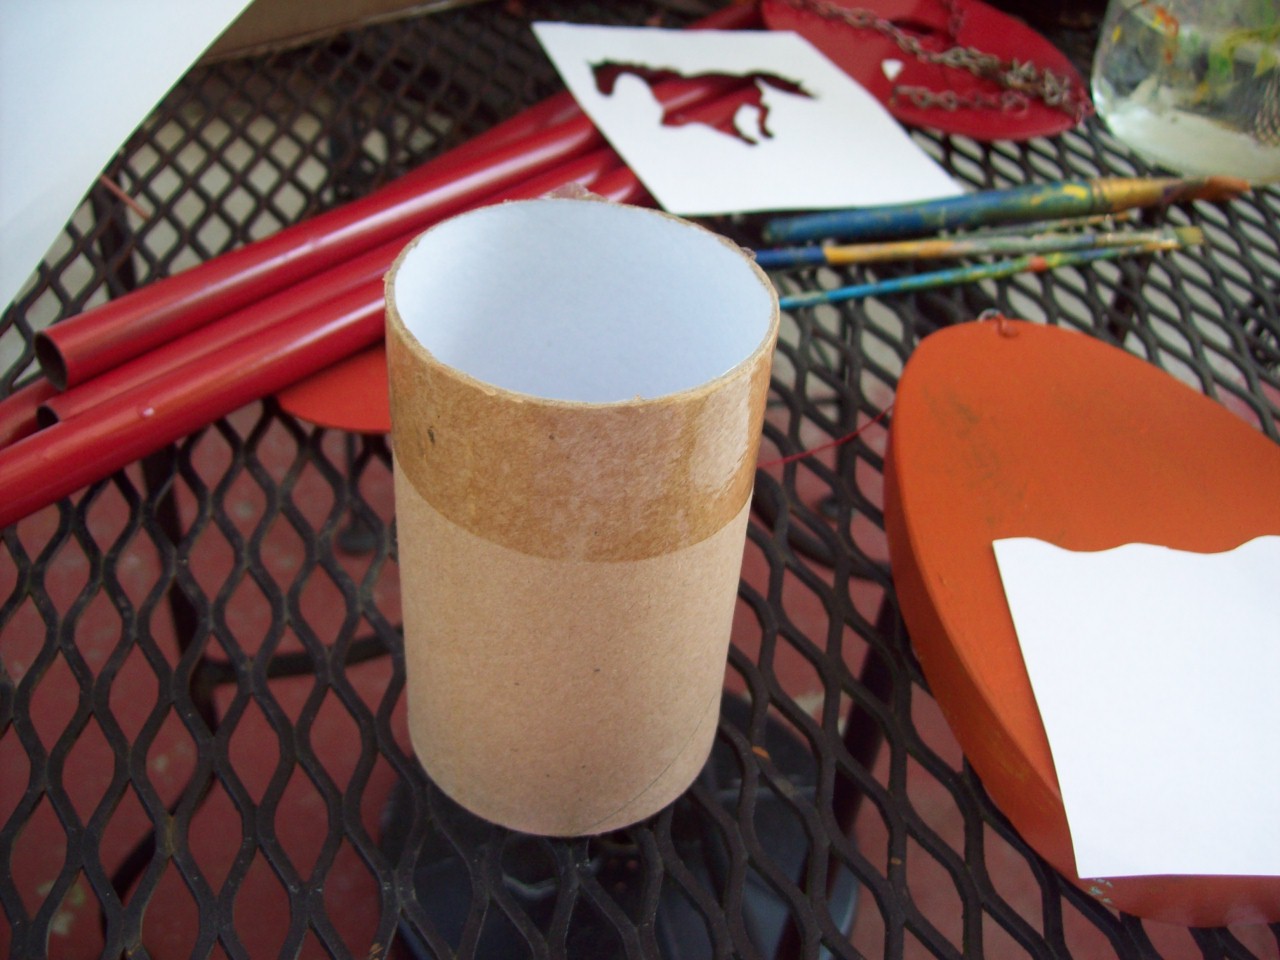

then I cut that shape out


cut the inner circle out for my sun and repeat the same steps above in yellow


now you let that dry 10 minutes then add a purple line thru your sun at the mid bottom part
by using your wavy paper

now take your paper away and just drag your brush on out across the wood horizontally and blend any colors there together, this makes your ground colors

I don't have to be perfect here at this point because I am going to add on a black horse running as my silhouette image. I printed the size I needed and cut out and placed it on where I thought it looked best below my far away sunset. (BTW you can find any image for the web to cut out and use as your stencil design, this one was from my art program so I used it. Feel free to copy & paste that image you see and just cut it out to use)


Here is when I used my black spray paint in a can found at walmart in the hardware isle cheapest can for 99cent


Wish now I had done a dessert scenery on my grill cover instead of retro food a few years ago. LOL
Because my patio area is getting a redo as I have time. I want to finish the western scenery on the bottom wall that I started this past fall. Which I will share with you as I do finish it. :)

Have a good weekend ya'll
And be sure to enter my giveaways while your here
~Julie~


love it. Im like you I like to make things an Im going to have to get some of that Air Dry
ReplyDeleteClay. Thats pretty cool stuff. I even have Sadie an our 2 neighbor kids making stuff.
stevebev2001@yahoo.com
Wow...you have some talent! I love it and have ZERO when it comes to being crafty. I have always envied anyone that can do so many creative things like this.
ReplyDeletethose turned out awesome! and dosnt look too hard! im not very crafty, but this looks like something i could do
ReplyDeletethis is really neat! i like it!
ReplyDelete- Stephanie J
Love you're just do it spirit! That looked like a lot of fun making your wind chimes and they turned out so cute. I really like the grill too. I bet Lowell looks for something different every time he comes home. lol
ReplyDeleteThis particular papers fabulous, and My spouse and i enjoy each of the perform that you have placed into this. I’m sure that you will be making a really useful place. I has been additionally pleased. Good perform! Koshi Fire Chime
ReplyDelete